Monday, December 4, 2017
Utility cabinets
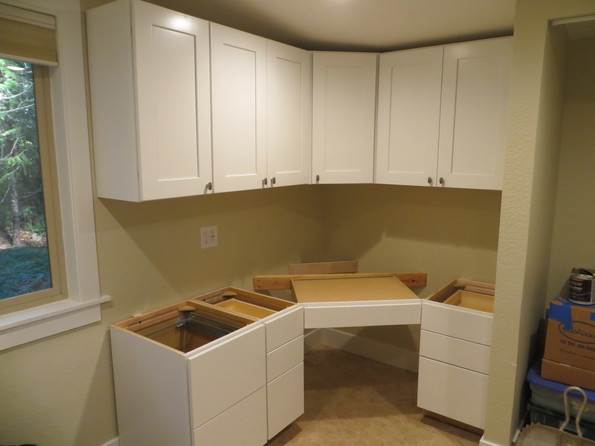
To make the utility room more useful, we decided to add some cabinetry and counter top. Not only will the cabinets provide additional storage, but the counter can be used for laundry, crafting, or even computer work. We looked at a couple of different options, with the goal being to minimize cost, but in the end, it seemed worth a bit more to have cabinets and counters that match the kitchen. So back to the Lowes special order cabinetry desk.
We received the cabinets on Friday and had them installed to the point where the counter top can be measured by Sunday. It really should have gone quicker but for a knee drawer.
The upper cabinets went up pretty fast. The corner was a bit more than 90 degrees, but not so much that it wasn’t manageable. Then we started on the lowers. The first problem we encounters was trying to remember the layout. Of course we had forgotten the layout at home. The three lower cabinets are all different sizes but after some trial and error, we had it worked out. Next we opened up the box with the knee drawer and promptly started scratching our head trying to understand how it gets installed. The first attempt to mount it didn’t meet with Genny’s expectations so it was nixed. One of the issues revolved around where the cabinets were positioned in order for the knee drawer to fit. When we drew up the plans and ordered the cabinets, we measured the walls but failed to take into account the base boards. Moving one cabinet over by 1/2” and all of them out by 1/2” threw off the design and pushed the last cabinet to where it overlapped the windows trim. The only solution seemed to be to try and re-build the drawer box smaller. After thinking about it a lot, I took a chance and cut down the face of the drawer box as much as I could (which wasn’t easy on an assembled drawer box). Test fitting that seemed to work and the cabinets ended up in the right place. However, the drawer face was now too long to fit. It was made with about 2” of overhang on each side, so off it came and was shortened by 7/8” on each side. With that, it cleared by about an 1/8” on each side. All that was left was creating a brace to hold the rear of the drawer box.
With the knee drawer sorted, the rest of the cabinets could be mounted to the wall and each other.

At this point, it’s ready to be measured for the counter top. But there’s still more to do. We have the crown molding for the top and the trim for the toe kicks. There are also a couple of filler pieces that need to be cut and installed. That’s work for another weekend.
Todo list
Utility Room
-
Fix ant infested ceiling joist -
Get roof fixed/replaced -
Replace electrical boxes -
Add recessed lighting -
Figure out washing machine drain -
Replace dryer vent -
Frame new closet -
Seal up the room -
New insulation -
New drywall -
Texture drywall -
Paint walls and ceiling -
Prep for tile floor -
Tile floor -
Grout floor -
Window and door trim -
Base boards - Install closet door
- Install cabinetry

