Monday, September 26, 2016
Fill, sand, repeat
Sometimes it feels like we’re stuck in an endless loop of filling and sanding with an occasional break for paint. Using cheap, knot filled pine boards means we do a lot of filling. In addition, the boards don’t line up well because of the twists and warps which means more filler. The end result is worth it though.

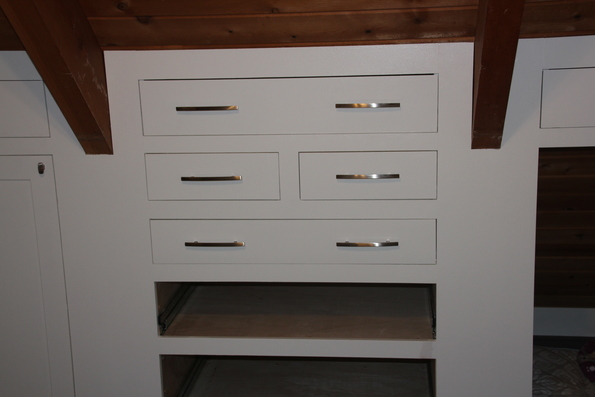
We’ve built and installed three drawers. The drawers are made of 1/2” birch pine. The front and backs are joined to the sides using half blind dovetail joints. Doing the dovetail joints on plywood doesn’t always look real good as the plywood tends to splinter quite a bit, but it does create a strong joint. This isn’t so important on the small drawers but with the bottom drawer weighing in at something like 9 cubic feet in volume, we don’t really want the front to pull loose when opening the drawer.
The last tip-out drawer for the back bedroom was built, painted, and installed. After doing 6 of these, it’s getting easier.
Once we finished up with the 3 pre-built drawers and drawer trim, we were left with nothing more that could be done in the back bedroom. So time to start on the front bedroom. We decided on a design:
One wall will have a small shelf, a bank of drawers, and door. The other side will have a door, a bookcase, and another door. Because the door openings will be fairly wide, we’ll probably do double doors both to limit the size of each door and they’ll need less swing area to be clear around them. We used up the remaining 2×4’s and added some framing in the front bedroom. Hopefully the front bedroom will go a bit quicker than the approximately 14 weeks that we spent on the back bedroom.
Stay tuned for our next episode where we’ll answer the important question of how many drawers can be built in a week?
Back bedroom
-
Dog cubby baseboard -
Dog cubby outside trim -
Figure out knee wall design -
Knee wall door trim -
Build/install bookcase -
Install hangers for clothes -
Install drawer carcasses - Install drawer boxes — 3/10th done
-
Install drawer trim -
Install baseboard - Trim wall to ceiling corners
- Install conduit for ceiling fan — almost finished
- Build new ceiling fan mount
- Install new ceiling fan
Front bedroom
-
Paint balcony door - Frame knee walls
- Trim knee walls
- Door for closet
- Drawers and doors for knee walls
- Install baseboard
- Install wall to ceiling corner trim
- Install conduit for ceiling fan
- Build new ceiling fan mount
- Install new ceiling fan
- Install grill cover for vent fan
- Install window blind

